Getting Started with Kubernetes
29 April 2021
Kubernetes is a container orchestration technology designed at Google and now developed by an open source community. It is rapidly becoming the template for large application deployments since it gives companies an easy way to implement the experience of some of the world’s best SREs, all of which has been serialized and put into the Kubernetes standard.

To get started experimenting with it, you will need a series of tools on your client, and then a kubernetes cluster to connect to.
Client Setup
This differs by OS, but the main tools you will initially need are kubectl and git. In my case I also need the Azure CLI since I’m alternating between AKS and Minikube. There are GUI tools like Octant, but kubectl is the official way of accessing the Kubernetes control plane, and will be updated with all the latest features on each release.
# If you are on Windows 10 and have chocolately installed:
choco install -y kubernetes-cli azure-cli
Cluster Setup
There are a variety of tools that let you run Kubernetes locally, as a cluster with a single node. Here are some examples:
- Minikube - a single node cluster that is simple to set up. Runs on Linux, macOS and Windows.
- Microk8s - much like minikube and also available on Linux, macOS and Windows. On Linux it uses snap for delivery.
- kind - another multi-os option.
You can google for any number of alternatives. I’m using minikube, which on windows/chocolatey is installed with:
choco install -y minikube
Namespaces
Once you have kubectl and a cluster such as minikube setup on your machine, you should be able to list out the pods, nodes, etc from the local cluster. These are divided up into namespaces, which act as a scope of authorization, in addition to being a way of virtually dividing up workloads. Firewall rules go from namespace to namespace, and secrets and configs need to be in the same namespace as they are being used.
# You can see what clusters are configured with:
kubectl config get-contexts

# Show the namespaces on the cluster
kubectl get namespaces

# Create a new namespace
kubectl create namespace rhart-scratch

# If you want to avoid typing '-n <yournamespace>' on every command,
# you can set the context to your chosen namespace:
kubectl config set-context --current --namespace=<yournamespace>
Pods, Nodes and Clusters
Each Kubernetes cluster is made up of nodes. The nodes are individual machines or VMs that will work together to run the workloads that you choose to put on the cluster. The nodes each run pods, which is the smallest unit kubernetes exposes, and typically contains one container, though it can have multiple containers if those things are tightly coupled enough to warrant putting in the same pod.
# Show nodes
kubectl get nodes -o wide

# Show pods
kubectl get pods -o wide
Deployments
In order to deploy pods to kubernetes, you use a template, which kubectl can generate for you. This might be for a:
- Deployment - this lets you manage a set of pods
- DaemonSets - this lets you run a pod on every matching node, such as New Relic
- Jobs - let you run a batch task
The following is an example of generating a template for apache. Alternately you could use any docker image.
kubectl create deployment rhart-test --dry-run=client --image=httpd -o yaml
This results in the following yaml:
apiVersion: apps/v1
kind: Deployment
metadata:
  creationTimestamp: null
  labels:
    app: rhart-test
  name: rhart-test
spec:
  replicas: 1
  selector:
    matchLabels:
      app: rhart-test
  strategy: {}
  template:
    metadata:
      creationTimestamp: null
      labels:
        app: rhart-test
    spec:
      containers:
      - image: httpd
        name: httpd
        resources: {}
status: {}
You can then deploy this to your cluster as follows:
kubectl apply -f rhart-test.yaml

# Watch the pods get spun up
kubectl get events --watch

# Get deployments
kubectl get deployments
If you now do kubectl get pods -o wide you should see your apache pod spun up. Deployments are persistant and don’t need to be applied again if the cluster is shut down.

Services and Ingress
Once a pod is spun up in Kubernetes, you can forward it to your local machine to access it, with a port forwarding command:
kubectl port-forward deployment/<podname> 8080:80
While this works for testing, the pod isn’t easily accessible to the rest of the cluster, or to the public internet. Services create a static name for a pod that won’t change unlike the IP address, which will be reassigned each time the pod is created.
# Show services
kubectl get services
Create a service.yaml file with the following:
apiVersion: v1
kind: Service
metadata:
  name: apache-service
  namespace: default
spec:
  selector:
    app: rhart-test
  ports:
    - protocol: TCP
      port: 80
      targetPort: 80
And apply it with kubectl -f apply service.yaml. Now if you do kubectl get services you should see something like the following:

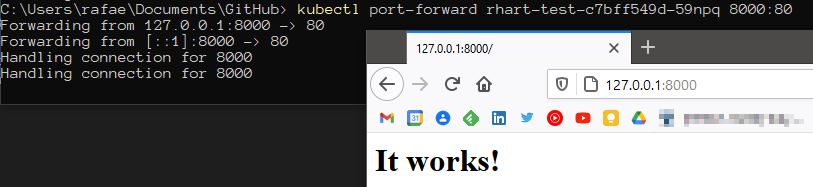
You can now forward this in a more civilized fashion:
kubectl port-forward service/http-service 8000:80
To allow the outside world to see this service, you need to add an ingress. The minimal-ingress.yaml from Kubernetes is a good place to start (i’ve made minor edits):
apiVersion: networking.k8s.io/v1
kind: Ingress
metadata:
  name: minimal-ingress
  annotations:
    nginx.ingress.kubernetes.io/rewrite-target: /
spec:
  rules:
  - http:
      paths:
      - path: /
        pathType: Prefix
        backend:
          service:
            name: apache-service
            port:
              number: 80
From this point your service should be accessible to the outside world. That’s all for now!